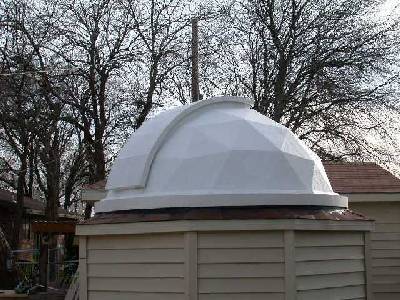
Dome Construction
I started this project because the slide-off roof that I had built last year had a few drawbacks. (1) It was taking to much effort to slide the roof panels on and off, (2) it was getting pretty cold setting under the open sky all night and (3) the wind was having to much affect on the stability of the telescope, (4) I have a lot of localized light pollution ( street lights, backyard lights)
I tried to show the construction process it some detail with pictures and some helpful comments, so that someone else would be able to build one. Be prepared for some work if you tackle this job, it took about 1 2 weeks from start to finish. I over built to some extent do to the weather that we get in Texas at times. Fiber-glass was applied to both the inside and outside of the dome.
At this point I have to give credit to Math Vos http://home.wanadoo.nl/m.m.avos/observatory.htm for a lot of the processes that I used. His site has some additional pictures that would be of great help.
The dome has a radius of 4 feet and is constructed using 6 pentagons, 5 hexagons and 5 half hexagons and is made out of 1/4 hardwood plywood. The dome is fairly light at about 70-80 pounds.
(Old Shutter Design)
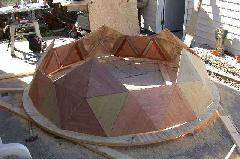
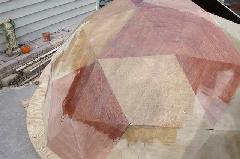
The above picture shows 5 pentagons and 5 half hexagons joined together to form the base of the dome.
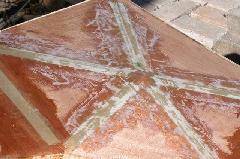
The above picture shows the inside of a pentagon. I cut some roof flashing into 2 inch wide strips and cut to length. Then scored the strips in half, the full length, just enough to give the panels a slight curvature when connecting them together. I used some contact cement to attach the strips to the panels, then constructed the pentagons and the hexagons. After the pentagons and the hexagons were built, lay the completed units facing up on a flat surface and apply waterproof glue to all joints ( this will make them more rigid) After the glue was set, I fiber-glassed over the inside joints, then sand the joints as needed. I did not fiber-glass the 1/2 hexagons because they need to be able to flex a bit when putting the base together.
After the base was properly arranged on the dome base ring, I attached the dome base to the base ring on the inside using some blocks cut to fit in all the corners. I filled all the joints with waterproof glue (gorilla glue expands and will fill in any voids)
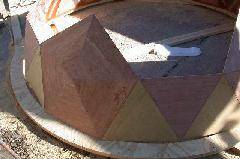
The above picture is after sanding.
After the dome had been put together, fiber-glass was
applied to the outside of the panels to give the dome some
stability before cutting the shutter opening.

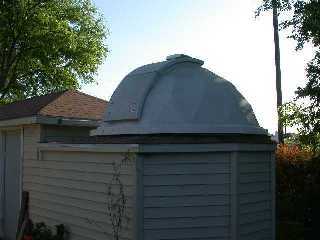
I installed a 2 ft wide shutter opening.
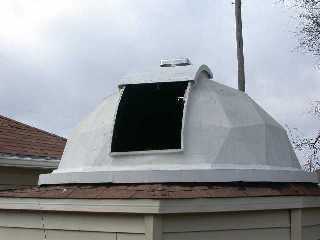
(New Shutter Design)
The shutter was built out of 3/4 plywood ribs (cut at the some time as the bases) and 3/8 plywood. After it was fiber-glassed, I cut it in half and attached a metal band to the upper half to give me a weather seal. The lower shutter half is just lifted out and when it is on the dome is secured by two latches. The upper half is attached to the dome on the top side with hinges, so it can be pivoted into it's viewing position. I installed an air vent in the upper section to help regulate the inside temp.
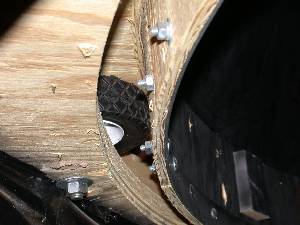
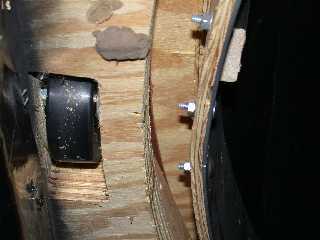
I used (10) 4 inch hard plastic wheels (need very little friction) with the steel bearings for the load and alignment wheels (5 each, evenly spaced). The alignment guide board was cut from some 3/8 * 4 ft * 8 ft plywood and attached to the dome base ring with some 3 inch wood screws. I also had to install a metal ring to the bottom of the guide board to stiffen it up and pull the joints together.
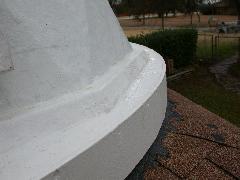
There is also a 3/8 plywood shirt attached around the outside of the dome base ring to keep out the elements. I did add some 2*2's(cut on a bevel) along the dome to base ring junction for some additional support (only used a single dome base ring) and to help with water run off.. Then I applied three coats of Elastomeric roof coating over the whole thing for waterproofing.
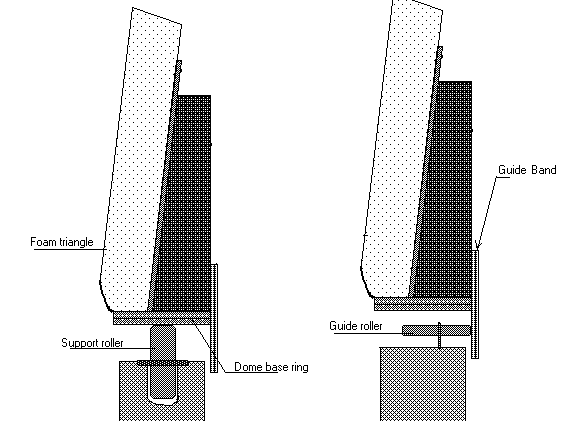
The above diagram was from Joe Garlitz's web site. I used it as a reference for my load and alignment
rollers. I used a single thickness of 3/4 inch plywood with a double layer of 1/4 inch underlayment that
was 6 inches wide for the dome ring, a double thickness and 4 1/2 inches wide for the support ring. The
support ring was mounted on a 2*6 support frame work.
Dome Lining
![]()
I picked up this insulating blanket from Lowes, that is made of a thin plastic
bubble wrap and has foil on both sides. Using contact cement I applied this
sheeting inside of the dome to help give it some insulation value. It does help
keep the temp down on the inside.
More information on domes and how calculate panel sizes, can be found at the following sites. Site1 and Site2