|
|
|
Knotless Tatting is a simulated-tatting technique that creates a tatting-like product without having to do the dreaded 'flip' that makes the true Tatting Knot. Dora Young received a U.S. Patent for this method on Feb. 22, 1977. One book was authored by her on this subject before her death. The method has never gained any sort of popularity. However, her description of the 'bridged chain' reminded tatters of the possibilities presented by the age-old technique of making a series of ring hitches back over a foundation thread.
One hundred twenty-seven years earlier this same method was described by Mlle Eleonore Riego de la Branchardiére in The Tatting Book, 1850, London. In working back over a foundation thread she says, "...stitches in these directions are worked in the ordinary manner: the thread from the needle (or shuttle) forms the stitch, and the thread of the material upon which it is worked the foundation: in the tatting it is the reverse."
It is often incorrectly stated that the tatted chain was first described in The Royal Tatting Book, 1864, London (i.e., tatting using the foundation and shuttle threads simultaneously, rather than making a foundation and overcasting ring hitches on it). The Bunch of Grapes pattern, published in 1850, used both the tatted chain AND the technique patented by Dora Young as "Knotless Tatting." |
| Knotless Ring Construction |
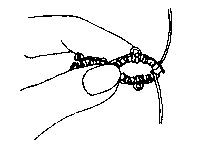 |
1. Completed knotless method ring. |
 |
2. A chain is made with the ball and shuttle thread starting at a distance of approximately one-stitch-width from previous work to form the first half of the ring. |
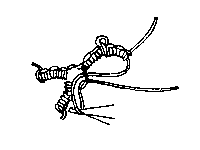 |
3. A loop of the shuttle thread is drawn through the space previously left with the hook. |
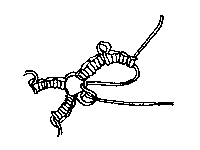 |
4. Pass the shuttle through the loop. |
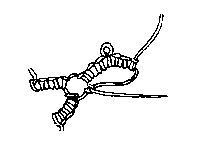 |
5. Snug the knot allowing only enough thread to gently arch like the chain previously made. |
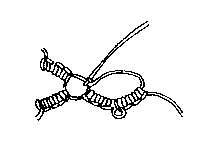 |
6. Turn the work over. |
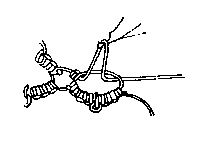 |
7. Draw a loop of the shuttle thread through to the front from the back. |
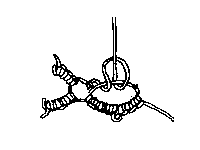 |
8. Pass the shuttle through the loop as shown. |
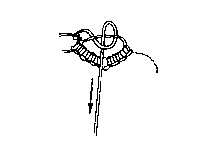 |
9. Rotate the knot by pulling the thread as shown (leave the knot somewhat loose). |
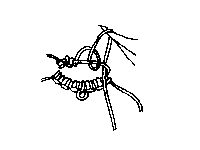 |
10. Draw the shuttle thread through to the back from the front at the same time snugging the first half of the double stitch previously made. |
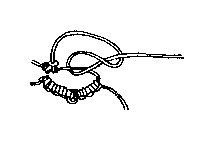 |
11. Slide the shuttle through the loop and draw the thread up until about an inch remains. |
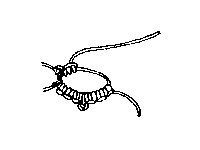 |
12. Using the thumb and forefinger snug knot to complete one double stitch. |
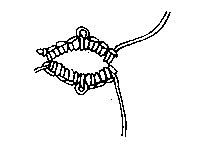 |
13. Repeat until knotless ring is complete. |
| Knotless Chain Construction |
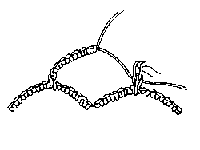 |
1. Normal chains are used in arching from picot to picot. A chain can be returned to its center by making a normal chain for half the length of the arch. A space of the shuttle thread is left the length of the second half of the chain. Draw a loop through the end picot of the chain. |
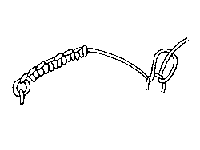 |
2. Pass the shuttle through the loop and snug the knot carefully leaving the space for the second half of the chain. |
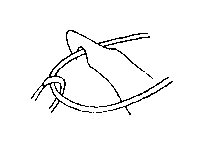 |
3. Turn the work over, reach under the arch-thread from the front and catch the thread with a hook. (note: the previously-made knot securing the foundation thread to the picot is missing from the drawing. |
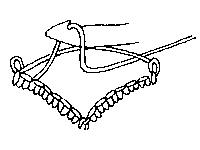 |
4. Draw a loop to the front and pass the shuttle through the loop. |
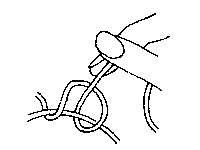 |
5. Draw up the excess thread making a loose knot. |
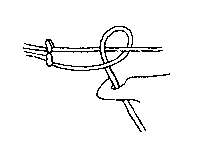 |
6. Draw the thread downward and reach under the arch thread from the back with a hook and catch the thread. |
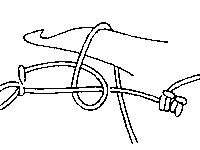 |
7. Draw the loop to the back and pass the shuttle through the loop. |
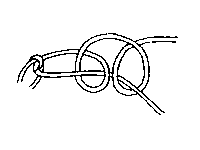 |
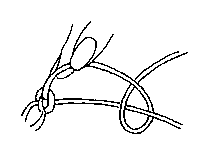
8. First double stitch made (loose). |
 |
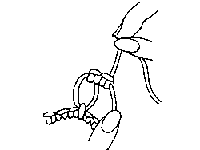
9. Draw up the first half of the double stitch. |
 |
10. Snug up the second half of the double stitch - double stitch complete. |
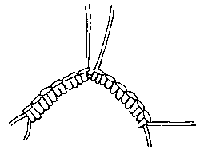 |
11. Repeat until second half of chain is completed back to the center. |


