Tatting
Translated from "Leçons de couture, crochet, tricot, frivolité,
guipure sur filet, passementerie et tapisserie, par Mme Emmeline Raymond"(Lessons
in Needlework, Crochet, Knitting, Tatting, Point Lace on Net, Passementerie
and Tapestry by Mme Emmeline Raymond). Raymond, Emmeline. 11th ed. (or printing),
no date, pp 139-61. 1st ed. 1868, Firmin-Didot frères, Paris. My thanks
for photocopies of originals provided by Melissa Roberts & Virginia Mescher.
Thanks also to Mary Seubold Cahill of The
Lace Museum for her assistance with 19th century French crochet ephemera.
Images and text ©2001 Dan Rusch-Fischer
Translator's note: Despite being the 11th edition, numerous errors still exist in the following patterns - they have been faithfully translated from the original and are left for the reader to discover - none are beyond a modestly experienced tatter's ability to rectify. The image copies I had to work from were very poor so I doubled their size and enhanced them as best I could, which is why this page may have taken some time to load.
IF YOU ENJOY THIS PIECE, PLEASE CONSIDER DONATING TO, OR JOINING THE LACE MUSEUM. GO TO "MISC/MISC INFO/MUSEUM" OR CLICK HERE FOR MORE INFORMATION. Dan the Tatmeister
|
 The ubiquity of this work requires us to make a place for it in this volume. When executed in very fine thread, tatting holds a place among the most beautiful laces. One can make extremely magnificent armchair antimacassars or couvre-pieds. It also replaces the most beautiful passementeries for trimming overcoats, jackets, dress blouses, children's garments; and, in these cases, one works with black silk cordonnet, colored silk, and by mixing it with pearls.
If the reader will follow our instructions word-for-word and, at the same time, consult our figures, accomplishing all the tatting presented will be easy. For those to whom this work is completely foreign, we advise following all our explanations initially with very large thread.
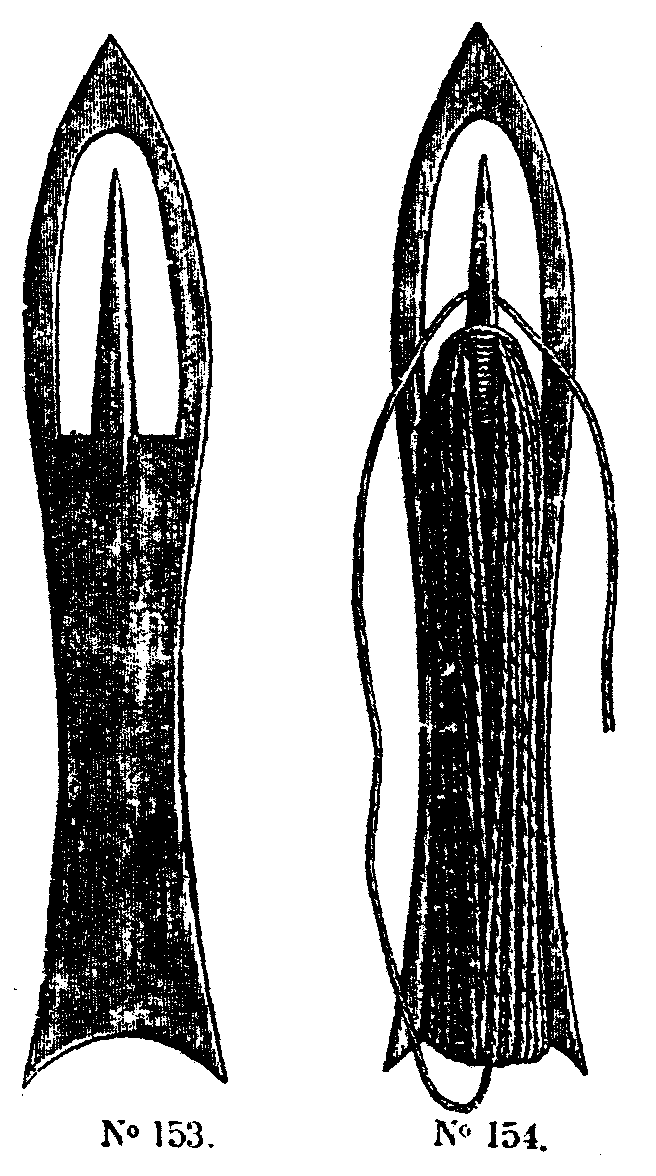
In order to execute the festooned ringlets that make up tatting, one uses a wooden, bone or ivory shuttle on which is reeled the thread, figures 153, 154; the knots are done in two ways designated as; forward knot and backward knot.
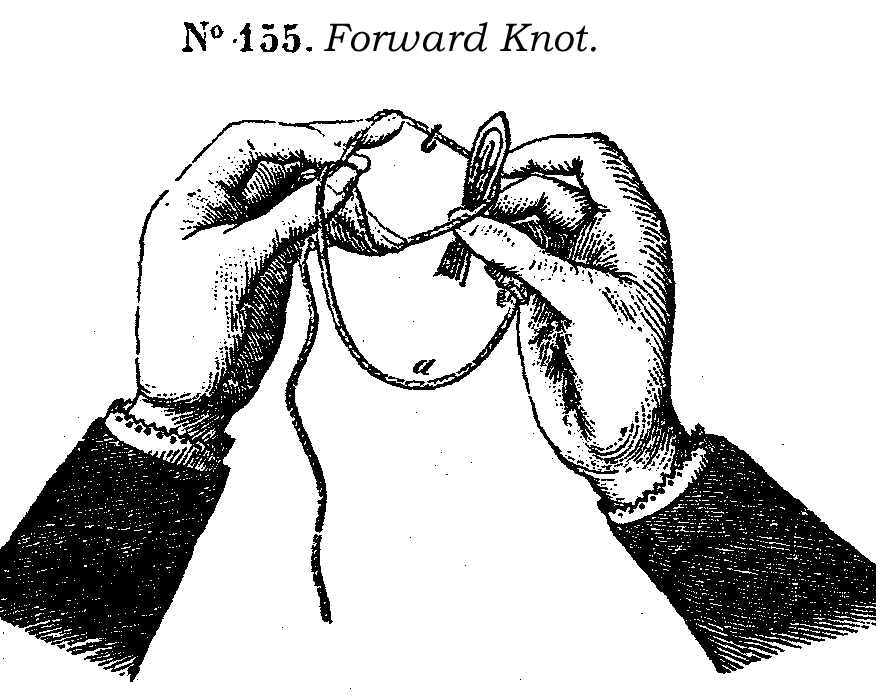
Take the shuttle filled with thread in the right hand, form a loop in the strand by retaining it with the three fingers of the left hand; hold the loop with the thumb and index finger of the left hand so that the end of the strand is towards the inside of the hand, while the shuttle thread passes over the thumb, figure 155. Slide the shuttle from the back to the front in the place indicated 'b' in the figure between the 2nd and 3rd fingers of the left hand, pull the shuttle and its thread taut to the right and as a result the strand 'a' will form the loop shown in the second detail.
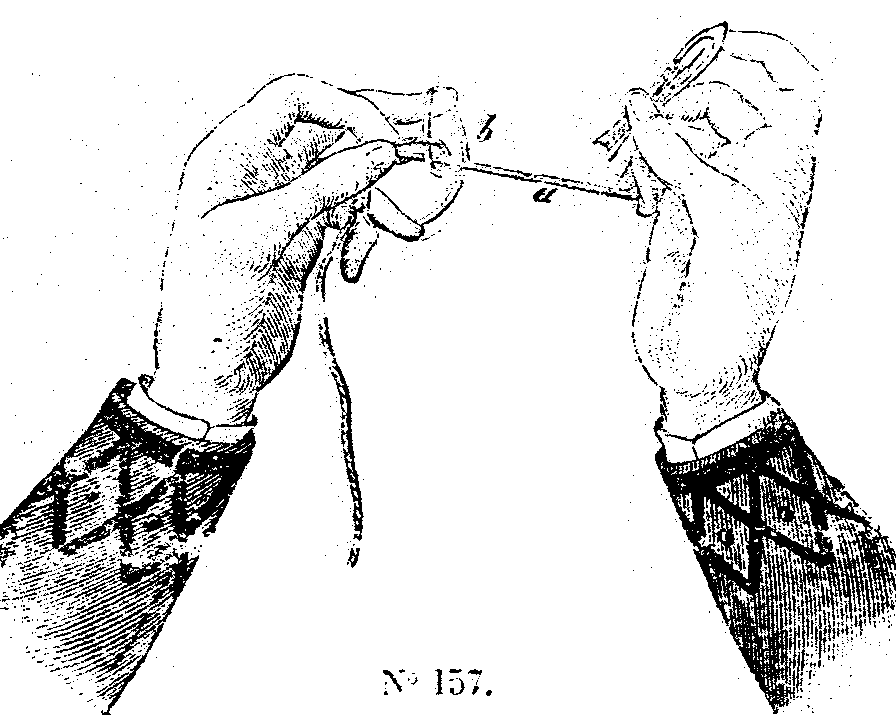
Slide the third finger of the left hand under the taut strand 'a' into the loop as indicated in figure 156. The strand 'b' is slid under the strand 'a' up to the thumb and index finger of the left hand while gradually lifting the third finger, figure 157. The forward knot is finished.
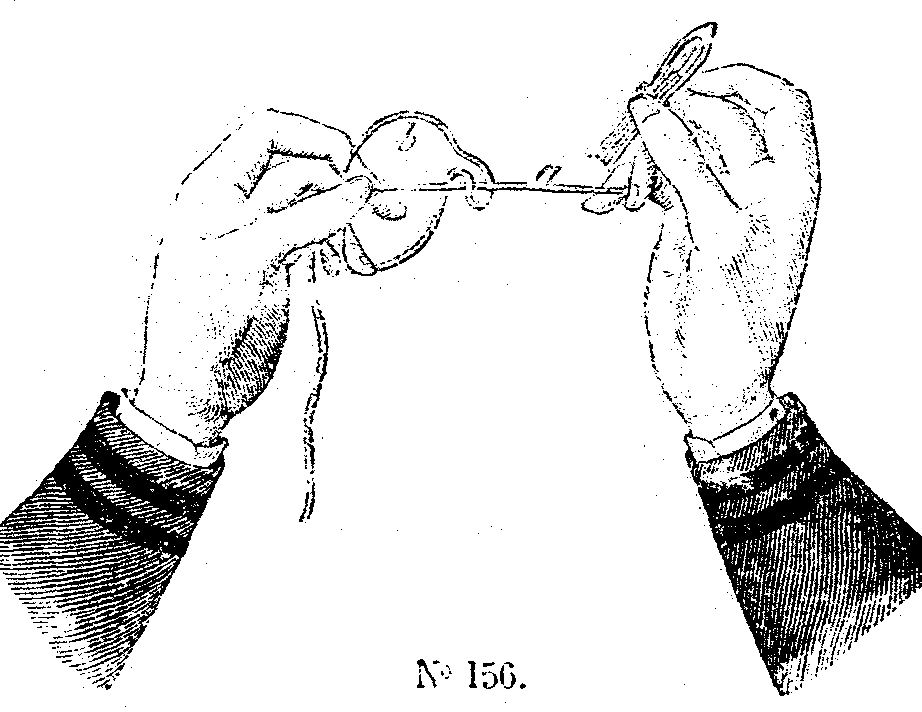
We continue the instructions by repeating here again; The main rule for good execution of the work is that strand 'a' must be promptly, strongly and horizontally tightened after the shuttle has been passed through the loop and must remain in this position while the fingers of the left hand transform the loop into the knot following the indications in figures 156 and 157.
Backward Knot
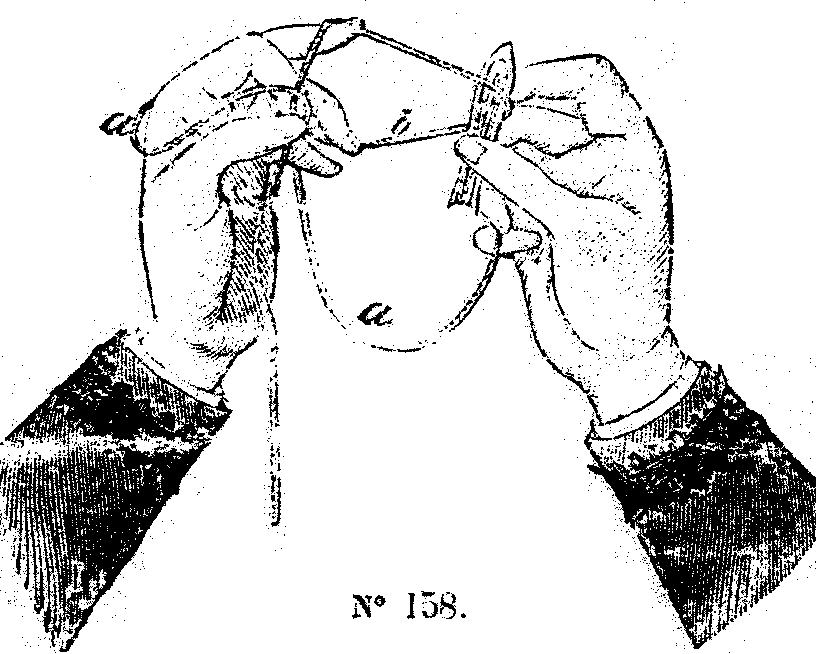
The position of the left hand is similar to that which is indicated for the beginning of the forward knot; but the strand 'a', instead of remaining in the inside of the hand is thrown over the back of the left hand; slide the shuttle through the loop 'b', but this time from the front to the back, figure 158, then tighten the strand 'a' in the horizontal direction towards the right, let the loop slip toward the fingers that is found around the back of the left hand, withdraw the third finger of the left hand from the loop.
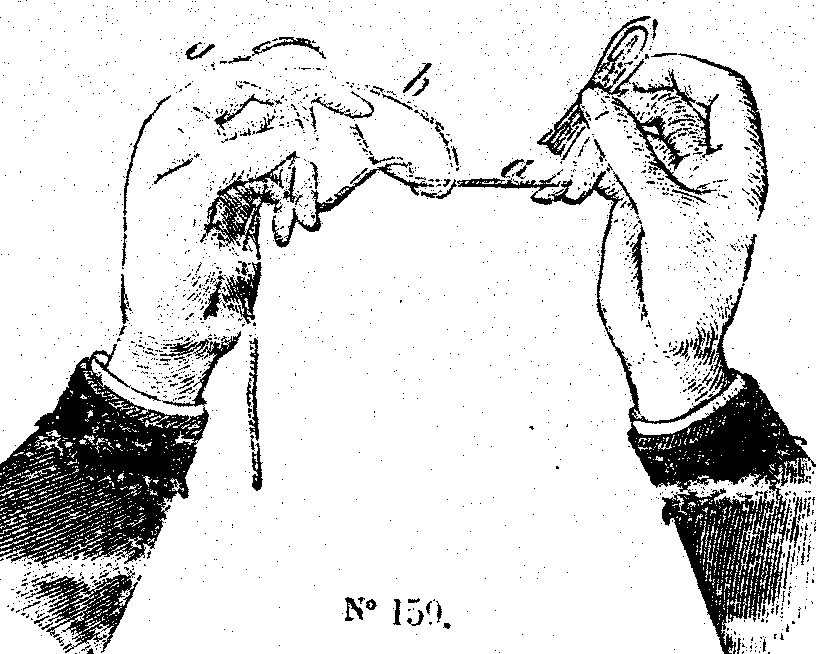
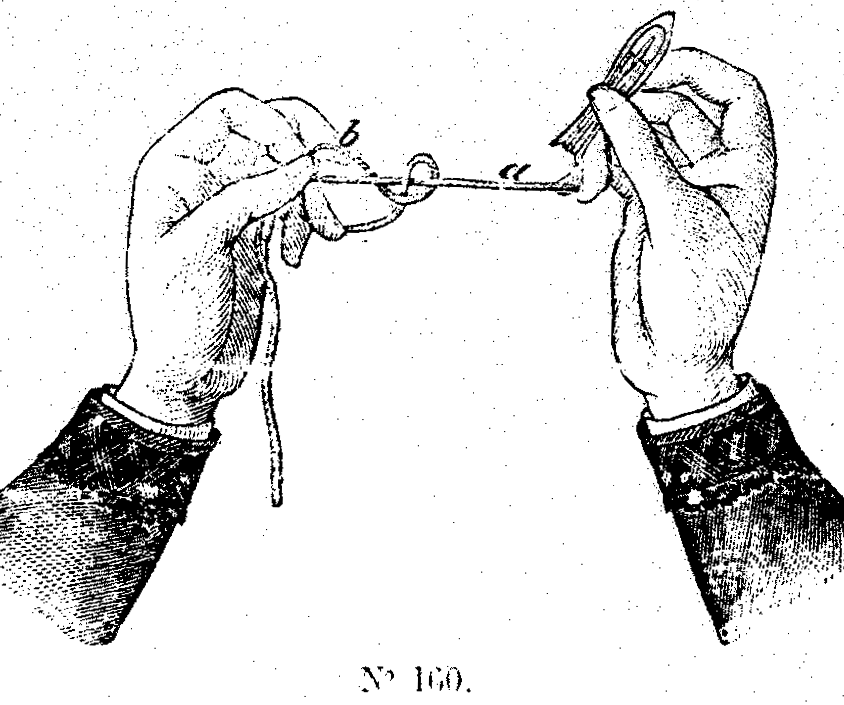
The loop 'b' having thus taken the form which is shown in figure 160, slip the third finger in the direction of the loop, at the place indicated behind strand 'a' as was done for the forward knot. The backward knot that has been formed is slid up against the forward knot. These two knots together are designated by the words double knot.
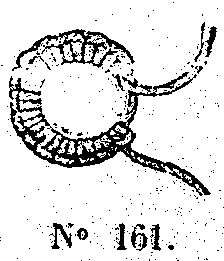 The beauty and symmetry of the work requires that all double knots begin with the backward knot. When, in the course of the work, the loop 'b' narrows too much, widen it by drawing from strand 'a'. When a sufficient number of knots are made, one closes the loop 'b', holding the row of knots between the thumb and index finger, until one obtains the scallop shown in figure 161; while tightening still more produces the effect called a: closed ring.
These rings form the principal ornament of tatting; one makes more or less knots around the outside at will. The simplest procedure for making a picot is to allow a space of one-half centimeter between two knots, i.e. at the spot where the knots are tightened, later when the knots are pushed together, the thread between the two knots forms the picot. These picots also serve to join ringlets and rings forming rosettes, borders, etc. To assist in making them one uses a pin, ordinary crochet hook or better yet a small tool, see figure 162 - tatting hook.
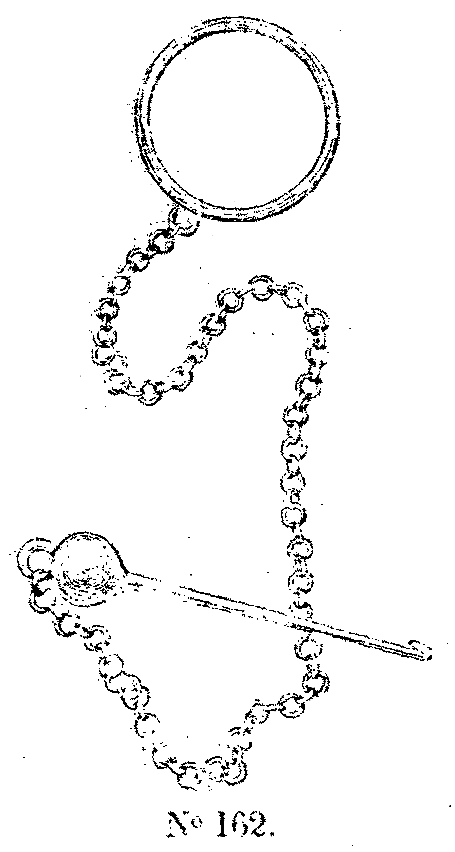
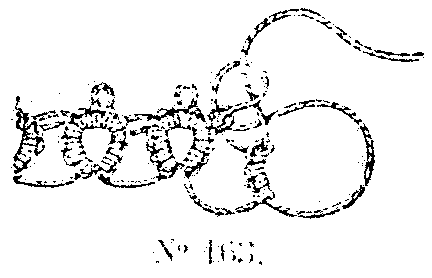
This hook is suspended on a ring which one wears on the left thumb, and which is thus always at hand. It is with this hook that one draws through the picot the strand that is around the left hand; this strand forms a loop through which one passes the shuttle; then one tightens strand "a" and the knot which has just been formed is added to the line of previous knots - the picot is between two tatting knots, figure 163.
When one has become familiar by practice with these instructions, it will be easy to carry out the various designs the which we will describe.
Two tatted lace borders with crochet.
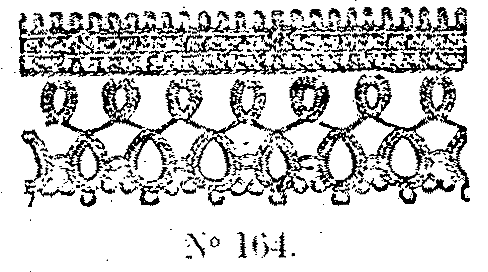
No. 164 - In order to execute this lace in the same size as the figure use No. 100 thread. Make: 4 double knots (that is to say 4 each of one backward knot and one forward knot), 1 picot - 4 repeats of 3 double knots, 1 picot - 4 double knots; tighten the strand in order to form a ring. For the small ring, make 9 double knots, but let about 1/3 centimeter between the this ring and the preceding one. Continue thus leaving the same space between rings, join the large rings as in figure 164 and as explained in the section on joining picots.
Make the crocheted border thus: 1st row, single crochet (followed by 6 chain stitches) into each small ring; 2nd and 3rd rows are made of half-double crochets worked into the row below and are separated by 1 chain. With the half-double crochets of the 3rd row form the small picots as follows: *Half-double crochet into first half-double crochet of the preceding round, let the loop slide off the crochet hook, pick this up through the chain stitch below, work a single crochet in the first stitch of the preceding row, one chain stitch, thread over the hook and then repeat from *.
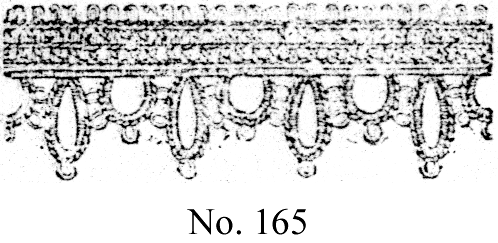
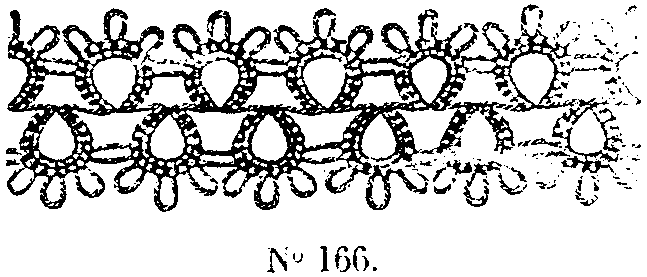
No. 165 - 4 double knots, 1 picot - do the following 4 times, 3 double knots, 1 picot, - 4 double knots; partially close the ring leaving about 1/3 centimeter at the base of the ring - leave the same space between this and the following ring, - make 3 double knots, joining to the closest picot of the previous ring, then do the following 2 times; 4 double knots, - 1 picot, - then 3 double knots, - 1 picot, - 3 double knots, then close the ring, making an oval.
The first row of the crocheted border is made entirely of single crochets, the two other rows are similar to the two last rows of the previous lace border.
Rosette No. 167. At the beginning, make 8 oval rings, each of 5 double knots, 3 picots separated from each other by 4 double knots, - 5 double knots; these rings or 'petals' are joined by their picots at the sides, then one tightens the circle as much as possible. Tie the working strand end with the beginning cut end, attach the ends carefully to the backside.
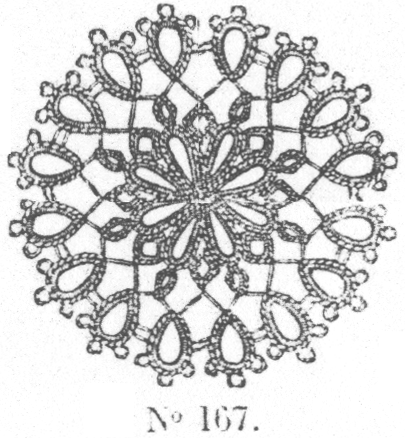
*Start another small ring which is composed of 12 double knots, and joined to the preceding circle after 3 double knots (with the picot of the middle of the first petal), then join it again to the picot joining together the first and the second petal of the rosette, at a distance of about 1/2 centimeter, make a ring composed of 4 double knots, - 5 picots, each followed by 2 double knots, - 4 double knots. At a very short distance make a very small ring, composed of 8 double knots, which, after the first 4 double knots, is joined together with the picot of the middle of the second rosette petal; at the same distance, another ring of 4 double knots, - 5 picots, each followed by 2 double knots, - 4 double knots; in joining, the first picot of the previous similar ring is by-passed, i.e., at this point the ring is joined to the fifth picot of the previous similar ring; leave a space of 1/2 centimeter and repeat from *.
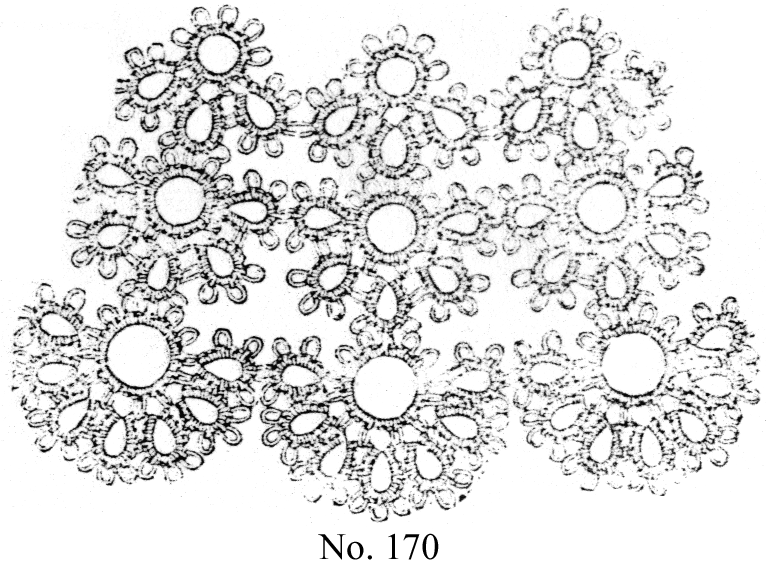
If our readers have made samplers, while faithfully following these instructions, our advice will be unnecessary for executing Rosette No. 168, the edgings, and all other tatting designs.
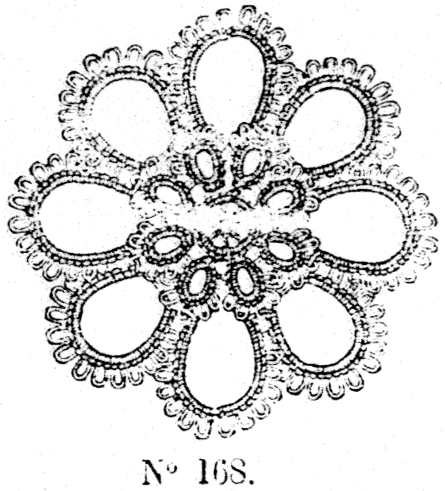
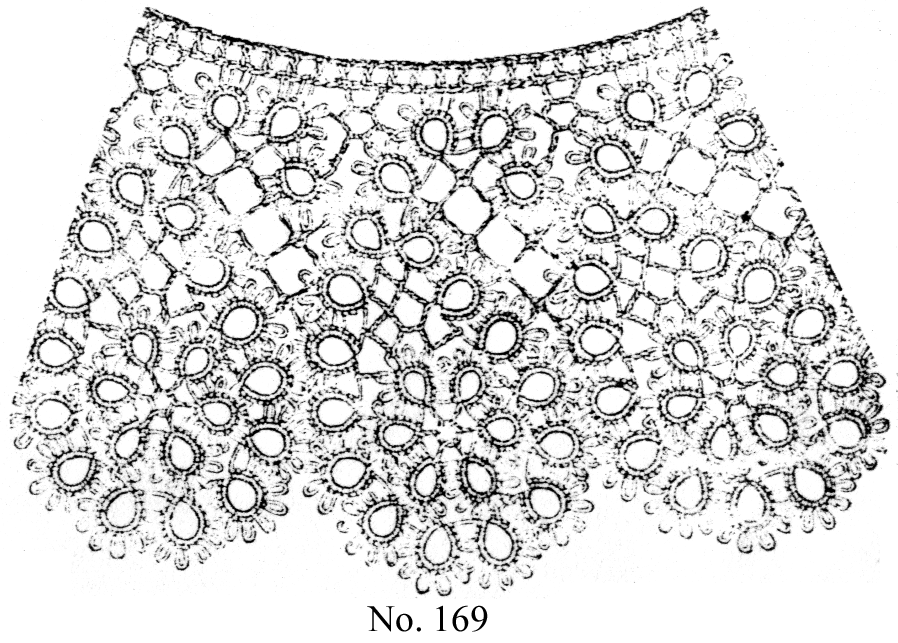
For rosette No. 168, we add only that the middle of the circle is filled with a 'wheel' (needle lace; it is also used for the paisley-palm filling in collar No. 169.
The neckline of the two collars are made with a crocheted border. Border No. 171 with beads and cord is made from silk cordonnet of medium weight. Use, for thread 'a', a fine silk button thread of the same weight as the silk cordonnet, on which are worked the double knots with the silk cordonnet that is used as thread 'b'. Before beginning, thread some beads on this thread, which replace the picots and are always slipped between two double knots.
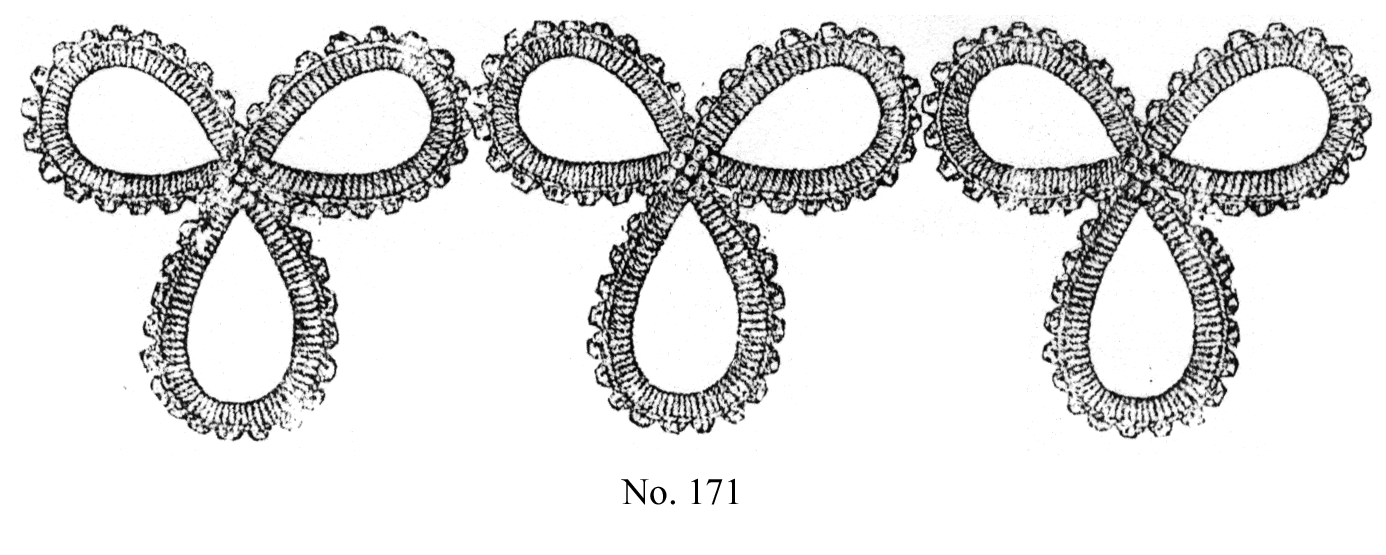
When the length of knots is sufficiently long, form the petals of the trefoil, and then sew some beads on the junction. These petals are tatted and shaped separately.
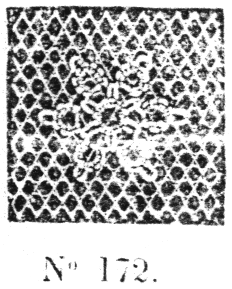
We add that tatted appliqué on tulle produces a charming effect, and we show a star appliquéed on some tulle, No. 172; its execution will be easy for everyone who has followed our instructions. This type of work is very pretty, among others strewn along the bottom of a bonnet.
No. 173 Cravat
This is made from 2 lengths of large and small rings along the length of which is threaded a length of black or brightly colored velour ribbon. Take No. 80 thread and make thus: * 4 double knots, 7 picots, and after each picot a double knot; this forms one of the lengths of rings, then, at a very small interval, make a ring composed of 5 double knots, - 1 picot, - 5 double knots; repeat from *, after each repeat, join the large ring after the first 4 double knots to the corresponding picot of the closest ring.
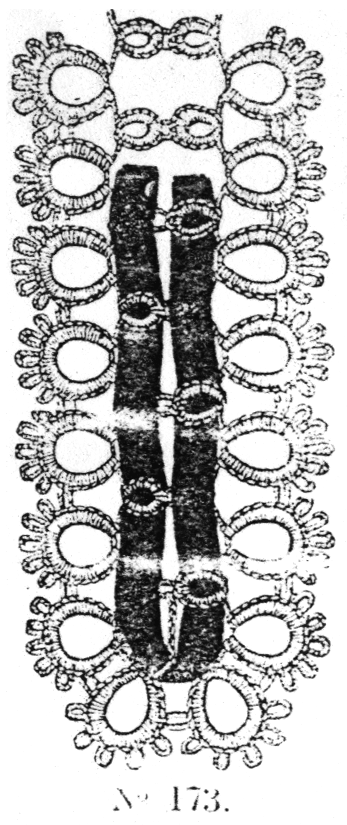
When one has made a sufficient number of rings for the length of the cravat, the round end is shaped; make 2 large rings separated by 1 picot, - then a small ring (5 double knots, - 1 picot, - 5 double knots), attach it to the picot of the corresponding small ring; make another 2 large rings and 1 small one, this one is joined to the same picot as the last small ring, continue the cravat by making alternately large and small rings, always joining to the small rings of the first length (opposite the one being made). See the above illustration for a part of the cravat.
The middle of rosette No. 174 is made from 5 rounds of petals superimposed on each other. Begin with the outside round which is the widest and made of 11 petals; for each petal make 16 double knots (each double knot is made of one backward knot and one forward knot), - 1 picot, - 16 double knots, tighten this length of knots, and before beginning the following petal on leaves a small length of thread serving as a bridge between the two petals.
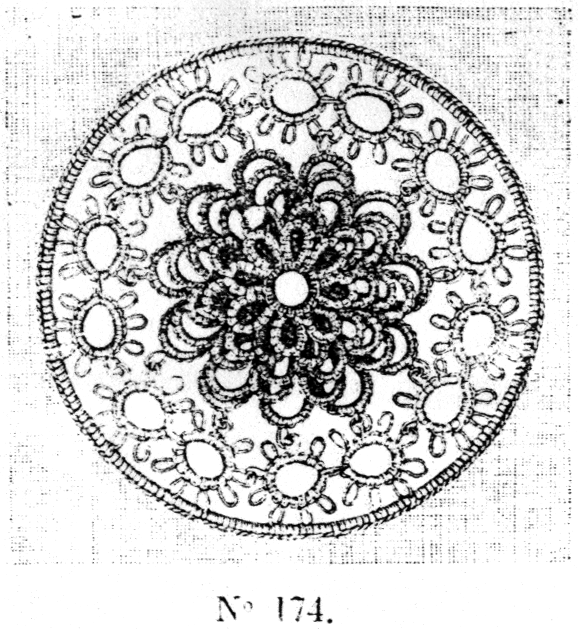
When one has made the petals, cut the thread, and, in order to form the circle, knot together the beginning end with the final end of the thread. Each of the 11 petals of the second round is made of 30 double knots; and, after having ended each petal, join the thread to the bridge left between each pair of petals of the preceding round. In each of the following rounds, the number of double knots diminishes by 5; consequently each petal of the 3rd round consists of 25, - of the 4th, 20, of the 4th, 15 double knots, and for each new round, always attach the thread to the bridges of the preceding round. So that the petals are not to compact, make only 10 in the 4th round, - and 8 in the 5th round, and consequently one needs to skip a bridge here and there from the preceding rounds. Prepare a ring made of 16 double knots and join the thread to the bridges of the last round after each 2 double knots. Finally, make the circles that form the outer circle; each ring is made of 24 double knots, separated 3 by 3 with a picot. These rings are attached by means of the side picots to the center picots of the first round of petals. When the rosette is attached to its destination, buttonhole the edge of the area in which it is placed, catching the picots of the outer rings (see illustration No. 174).

 The ubiquity of this work requires us to make a place for it in this volume. When executed in very fine thread, tatting holds a place among the most beautiful laces. One can make extremely magnificent armchair antimacassars or couvre-pieds. It also replaces the most beautiful passementeries for trimming overcoats, jackets, dress blouses, children's garments; and, in these cases, one works with black silk cordonnet, colored silk, and by mixing it with pearls.


 The beauty and symmetry of the work requires that all double knots begin with the backward knot. When, in the course of the work, the loop 'b' narrows too much, widen it by drawing from strand 'a'. When a sufficient number of knots are made, one closes the loop 'b', holding the row of knots between the thumb and index finger, until one obtains the scallop shown in figure 161; while tightening still more produces the effect called a: closed ring.


