Fixing a Malware Infected PC
By Wayne Maruna
I’m really tired of reading about malware and the prevention of same on Windows
based computers. Yet I feel compelled to write on the subject once again, having
spent considerable time this day deleting a flurry of infected emails that were
stopped before they could reach the Tabmail, Taberna's community email
distribution list. If our Tabmail server is getting pounded like this, then
surely individual email accounts are getting hammered as well.
Hopefully everyone reading this already has an up-to-date anti-virus
program installed, and maybe some of you have followed my previous advice and
installed the pro version of Malwarebytes (a one-time fee of $25 at
www.malwarebytes.org) to help bolster
your defenses. Still, it seems like
no matter how high and deep you build the fortification walls, the enemy
sometimes manages to get into the compound.
When that happens, you’re either going to have to pay some techie to fix your
machine (wink, wink), or you’re going to have to be prepared with some special
computer-style weaponry at your disposal.
The first thing to try is a scan with Malwarebytes, but sometimes even
that fails. Some of this malware boots up when Windows starts, and can disable
installed anti-malware programs.
The secret then is to use an anti-malware program that starts BEFORE Windows
does, and in fact doesn’t run under Windows at all.
Many of the trusted, established anti-virus vendors make such tools available
for free. However, just like you
need to plan in advance for a hurricane, you also need to plan in advance for
the day your machine succumbs to an infection. That
means downloading these special ‘off-line’ virus detection and removal programs
before you need them, and while your computer is still uninfected.
Here is a list of some off-line tools I have used, along with their respective
web links:
Avira Rescue System,
http://www.avira.com/en/download/product/avira-rescue-system
AVG Rescue CD,
http://www.avg.com/us-en/avg-rescue-cd
Bit Defender Rescue Disk, http://download.bitdefender.com/rescue_cd/2013/bitdefender-rescue-cd.iso
F-Secure Rescue CD,
http://www.f-secure.com/en/web/labs_global/removal-tools/-/carousel/view/142
Kaspersky Rescue Disk 10,
http://support.kaspersky.com/4162
Trend Micro Rescue Disk,
http://www.trendsecure.com/Info/Rescue_Disk/html/download.html
Windows Offline Defender (32 and 64-bit versions),
http://windows.microsoft.com/en-us/windows/what-is-windows-defender-offline
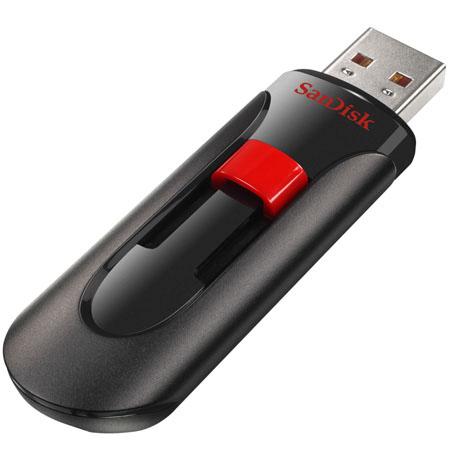
Most of these programs can be installed onto CDs or flash drives.
I much prefer flash drives, since part of the program’s process is to
download virus signature updates, which can be saved to flash drives but not to
CDs. So you’re going to need a
small (4GB is plenty) flash drive for each of these tools you want to
employ. To build my arsenal, I was able to find 4GB flash drives online with a
delivered price of $3.11 each, but you should expect to pay at least double that
locally.
The downloaded files come as what are called ISO files, which is a special type
of file that is compressed and contains all the files you’ll need to make the
program operable. In most cases, you
will also need a program designed to uncompress the ISO file and transfer the
contents to the flash drive, and also to make the flash drive bootable.
In most cases, a program called UNETBOOTIN will do the job.
Get it here:
http://unetbootin.sourceforge.net/
. Ignore all the verbiage that talks about Linux distributions, but do read the
how-to section. In the case of these
download files, you would click on the option Disk Image, and navigate to where
the downloaded ISO file is saved on your hard drive.
Likewise when pointing to the USB drive, make sure you select the correct
drive letter for the desired USB drive.
I know this can sound quite confusing, but if you need help, look me up
in the directory and give me a call, and I will walk you through it.
Once you’ve created your bootable USB drive with an installed rescue program,
power off your PC, plug the USB drive into an open port, and power up the
machine. Watch as the system boots
for a Boot Menu option; often this involves pressing the F12 key upon the first
boot screen to get to a screen where you can select the option of booting off
the USB flash drive. After that,
just follow the on-screen prompts.
Most of these programs run under a version of Linux, so things will look
different than you are accustomed to seeing.
I will tell you that not all of the above rescue tools will run on all machines,
which I why I like to keep several versions available.
But when you do find one what will run properly on your machine, it is
likely to do a good job of finding and removing the enemy within. And if it
doesn’t, you may be dealing with something called a rootkit virus, which is a
special type of malware that is especially good at playing hide and seek. If
you’ve got one of those nasties, you may need to download and run an
anti-rootkit program like Kaspersky’s TDSSKiller (http://support.kaspersky.com/us/5350#block1)
or BitDefender’s Rootkit Remover (http://labs.bitdefender.com/projects/rootkit-remover/rootkit-remover/),
both of which run under Windows.
Hey, I never said it was easy. But
I have laid bare the contents of my anti-malware toolkit to give you the best
chance of rescuing your PC. Of
course, if you make regular backup images of your computer, you could just
recover your system from a recent image backup and avoid the whole malware
removal hassle. You DO make regular
system backups, right?