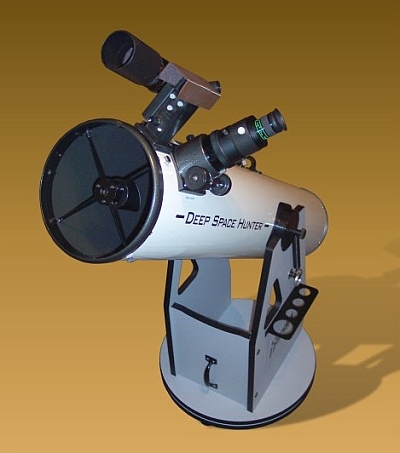

Hardin 8" f6 Deep Space Hunter
Manufactured by Guan Sheng Optical Company, these scopes are (like many other astronomical products from China) a remarkable value for the money. Just remember what they are, and what they are not.
What they are, is a lot of scope for a relatively little bit of money. Inch for inch, the scopes from Taiwanese Guan Sheng and mainland Synta offer some of the better values in astronomical equipment available today. Reasonable aperture (4.5" through 12") is available a a reasonable price.
What they aren't, though, are "premium" telescopes in the vein of Obsession, Starmaster, Tele Vue and other top-end models. That's not to imply that they aren't good, but you simply won't find the "out of the box" craftsmanship inherent in those other brands. For most observers, this is an entirely equitable trade-off. While I have, in all modesty, what I consider to be a relatively premium Dobsonian (the TeleKit) and have owned a premium refractor (a Genesis), I'm still enjoying my DSH 8 immensely. It's a good, usable and extremely fun scope to have.
That being said, as virtually all Guan Shynta (?!) owners have discovered, there are very definite advantages to be realized from a little judicious tweaking here and there, to say the least. I've spent a bit of time on this little 8 inch f6 scope.
So far, I've ...
♦ Replaced the azimuth Teflon pads with slightly larger ones since the original staples were starting to rub on the rocker box. I used screws to attach mine. Slightly smaller screws would have been preferable, but I used what I had on hand.
♦ Replaced the original azimuth bolt/shaft with a properly sized bolt, T-nut, Nylon bushing and Nylon locknut.
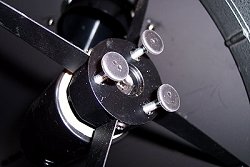
♦ Made a "washer" of laminate to serve as a mending plate against which the secondary adjustment screws turn. This will prevent them from digging into the soft plastic of the secondary holder.
♦ Added laminate to the bottom of the rocker box. Originally, it was just the Melamine that's used to cover the rocker box.
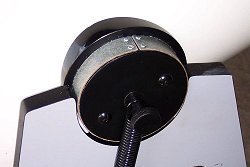
♦ Wrapped the altitude bearings with laminiate.
♦ Made a front-end glare shield from "Funky Foam".
♦ Added a few large plastic "washers" cut from milk jugs to fine-tune the azimuth movement.
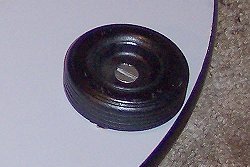
♦ Replaced the somewhat pointed and too-small plastic feet on the bottom of the ground board with flat round feet. These were actually wooden wheels I found at a local crafts store, but they work great.
♦ Removed the metal plate from behind the primary mirror. I also made sure that the mirror was not pinched in any way. The design of the cell really doesn't allow for much support across the back of the mirror, but it's about as good as can be expected now.
♦ Added various counterweights, washers, handles and whatnot, including a permanently attached 8oz brass counterweight behind the mirror cell and two magnet-backed 4oz brass weights that can be positioned as needed.
♦ Replaced the (good quality) 8x50 straight-through finderscope with the 9x50 RACI (right angle, correct image) finderscope that I was using on my TeleKit. That scope now has an Antares 8x50 RACI finder in its Losmandy mount. My height and neck demanded this change!
♦ Attached the extra mount for my Rigel QuikFinder so I could swap it between the TeleKit and DSH. However, it didn't take long to decide that it would be better to have a separate QuikFinder for each scope, so I ordered one of the modified ones sold by AstroSystems. These units use "AA" cells instead of the smaller "button" batteries, resulting in a MUCH longer life. My fears may be unfounded, but after seeing how the "latch tab" on the QuikFinder flexes each time it's inserted and removed from its base, I was concerned that it would eventually break, leaving me little means for keeping the unit on its base.
♦ Cleaned and re-greased the focuser with (real) lithium grease. However, like some others, I discovered that the incredibly sticky glue grease that's "factory standard" also served to cover various design and fabrication flaws. There's no really adequate method to adjust the tension of the drawtube without seriously affecting just about everything else. Adjusting it tighly enough to prevent the drawtube from falling under its own weight introduced a terrible roughness to the motion. I've hopefully managed to rig something that will work, but suspect it's just a matter of time before this (basically piece of junk, frankly) focuser is replaced with something properly designed and manufactured. I've now replaced the R&P focuser with a GSO Crayford. Much better. Although not quite as nice as a Moonlight or similar, it wasn't anywhere near the price, either.
♦ Replaced the Phillips-head secondary collimation screws with some homemade (but decent) thumbscrews, for totally tool-free collimation.
♦ Completely covered the inside of the tube with ProtoStar flocking material.
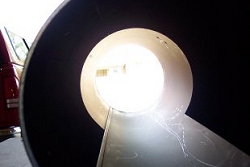
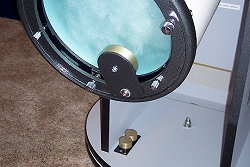
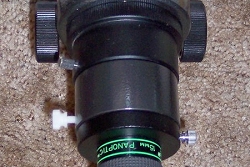
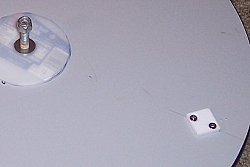
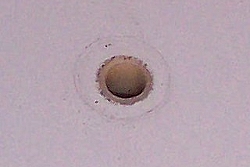
The images above show some of the modifications I've described above, including a focuser extension tube that was necessary to bring any of my eyepieces to focus. I don't think it was an issue with my eyepieces (which run the gamut from cheap to nice), but rather just a "too long" focal length of the primary mirror. You can also see the dramatic difference in reflectivity between the "black" paint and the flocking material when the scope was partially covered.
Individually, these changes are small, but collectively they make the difference between a scope that's irritating and one that's a joy to use. For more photos of most of these mods, as well as many others' work, join the skyquest- telescopes Yahoo group.